
Basics of Getting into Vehicle Graphics
Looking for something that can pull in great margin and long-term consistent business? Vehicle graphics are a great way to accomplish this goal.
Two Things to Remember: Versatility and Scalability
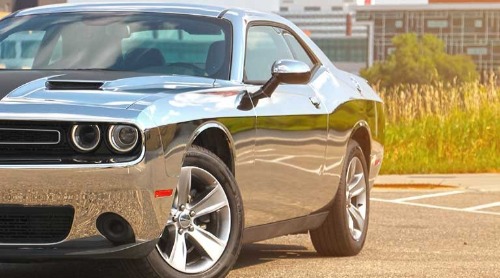
Vehicle graphics are versatile. Full wraps, partial wraps, body panels, pinstripes, decals, and logos are all different versions of vehicle graphics. You can cover the entire vehicle for maximum impact, or you can integrate your designs with the natural color and style of the car to create something truly innovative and eye-catching.
Vehicle graphics are scalable: Incorporate multiple colors and textures of vinyl, along with window perf and paint protection film, or trim it down to a simple rectangle logo for the driver door for those on a budget.
The vehicle is the best possible canvas for local advertising because there’s literally hundreds of square feet of advertising space and it is usually moving. It checks most of the boxes of compelling advertising, it’s quick, effective, and attractive. When a vehicle is moving by quickly, a potential customer has enough time to recognize that it’s a design they like, what the wrap is trying to say, and usually a website or phone number. No time to scrutinize design or ad copy. No time to find flaws in the messaging or design.
Where to Begin?
Start with a roll of vinyl and a squeegee. Those are the basics. As you scale your technique, you can scale your equipment. If you already have a digital printer, you’re halfway to providing the high-margin applications that most businesses are looking for. There are some extra tools that can help bring you to the next level:
- Heat Gun: For complex curves or softening the vinyl enough to mold around door edges.
- Magnets: Great for positioning the media prior to pulling the liner to expose the adhesive. Think of it as a trial run or a dress rehearsal.
- Wrap Gloves: see above; heat gun
- Cleaning Supplies: Your surface needs to be completely prepped if you want the adhesive to stick and the vehicle graphic to last. This includes isopropyl alcohol, lint-free rags, adhesive remover, and glass cleaner.
 Most important of all: PRACTICE, PRACTICE, PRACTICE. This is a skill that needs to be learned and applied on a regular basis because the canvas for this masterpiece very often costs tens of thousands of dollars. You need to be able to get it right without making mistakes.
Prep Step
Prepare your area before you apply. Clean away dust and dirt to prevent static from pulling it in later as you apply and causing your wrap to fail. Don't just sweep it under the rug- sweep it out of your shop!
First Steps
Try some single-color wrap vinyl on your own vehicle to get familiar with handling the materials. Don’t worry about the finish of the paint, the size of the body panel, or the material (plastic or metal). The first part of wrapping is handling the adhesive. This is technically applying a sticker, but you’re doing it a few square feet at a time on a very irregular surface.
*Quick Hack – Always tack in the middle of any decal, regardless of size. Press the squeegee lightly against the center of the object being wrapped and smooth the vinyl from the middle to the sides. This way you can eliminate air and get a smooth application. By the time you get to the edges, the real fun begins.
As many car wrap experts will tell you, “The wrap never fails in the middle of the door. Always on the edges”. This is where the practice comes in. Applying pressure-sensitive adhesive film to a flat surface is child’s play, you are aiming for the big leagues: convex curves. This requires a lot of practice to get it right.
Apply Heat
A heat gun is a great tool for both notice and advanced installers. Wrap materials are now get more and more advanced and easy to install due to air egress technology that a bargain hair dryer can even help get the job done, but you'll want to invest in a solid heat gun. The tool is made to apply the proper, even heat the job requires. We recommend heat guns with temperature gages and/or basic safety features to prevent you or your shop from burning. Be careful NOT to apply too much heat. You can overdo it. You can always add more heat, but you can NEVER add less. Basic rule: apply heat to the area that needs to stretch (like a side mirror or the edge of a door) in a circular motion and pull the vinyl (careful not to overstretch! this will also cause your wrap to fail), while applying pressure from the squeegee to keep the surface smooth.
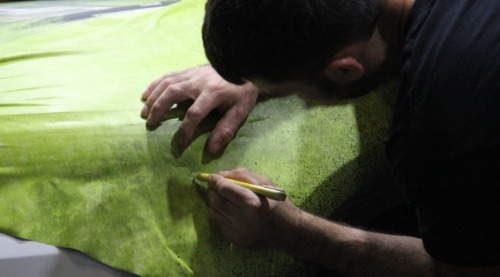 To Knife or Not to Knife
This is a challenging question to answer. Knives are cheaper and more effective, but also prone to the most liability. Knives are recommended for experts. Stay away from them if you’re a novice. What can substitute for a good knife? Try liner cutters or a back-slitter knife. You can even get a good pair of serrated edge scissors. Perhaps not as precise as a good OLFA cutter, but the peace of mind to not have to pay to repair the paint is worth it. You want to get into vehicle graphics to make money, right?
Other Great Tools
Get a tool belt to store all your gear. Vehicles are big, odd-shaped objects. You’ll need to get around them, under them and on top of them. You’ll want your tools within easy reach.
This is by no means a comprehensive guide. This is simply a primer to get you started in the world of vehicle graphics. It’s an amazing world to be in and there are tons of resources available from some really talented professionals in the industry. Great ways to improve your skills are Wensco Wrap Classes and the Wrap Institute Videos. As your skill improves, you can move on to advanced techniques like removing vehicle logos, edge seal tape, color change vinyl, and metallic ink effects.
Also, don’t forget, once you can wrap a car you can wrap anything! Appliances! Furniture! Buildings! The sky is the limit because it’s all the same skill and it’s all the same material. You’ll never know until you take the first step. Get wrapping!